Prerequisites
Before you begin, you’ll need:- Administrative access to your Okta Workforce account
- The SSO configuration details from Ally Security (we’ll provide these after you request SSO setup)
- The email domain(s) that should be enabled for SSO
Step 1: Create a new enterprise app in Okta
- Navigate to Okta and sign in to your admin account.
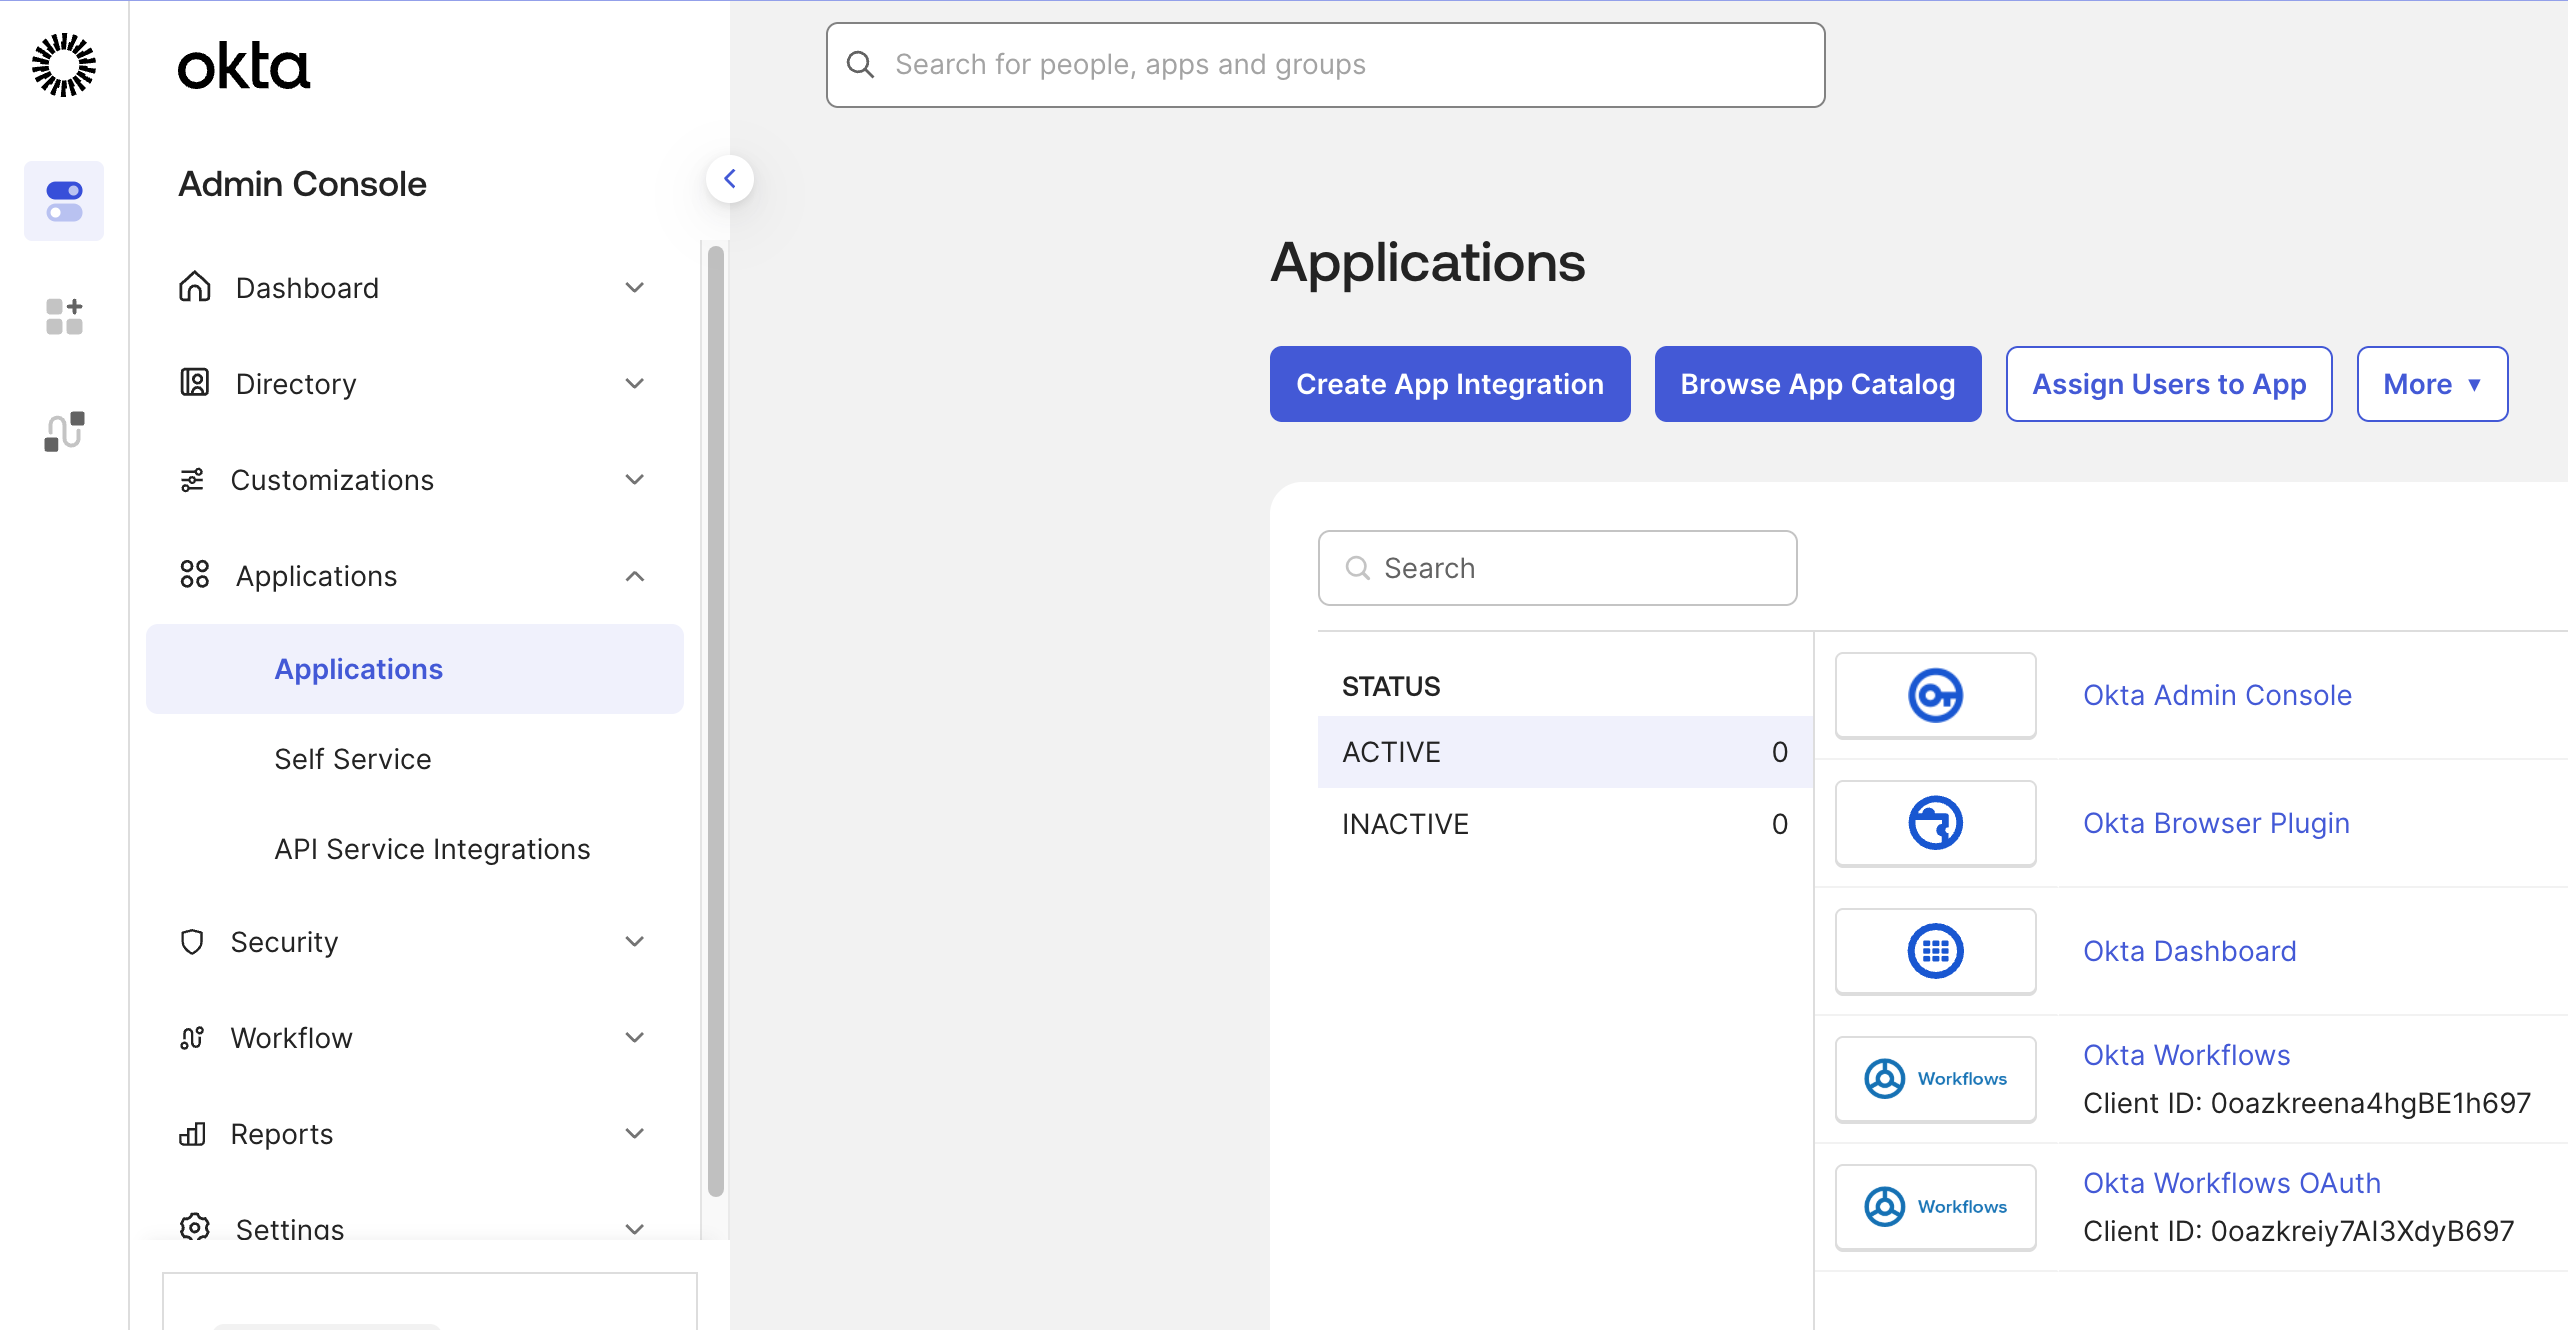
- In the Okta dashboard, select Admin in the top right corner.
- In the navigation sidebar, select the Applications dropdown and select Applications.
- Select Create App Integration.
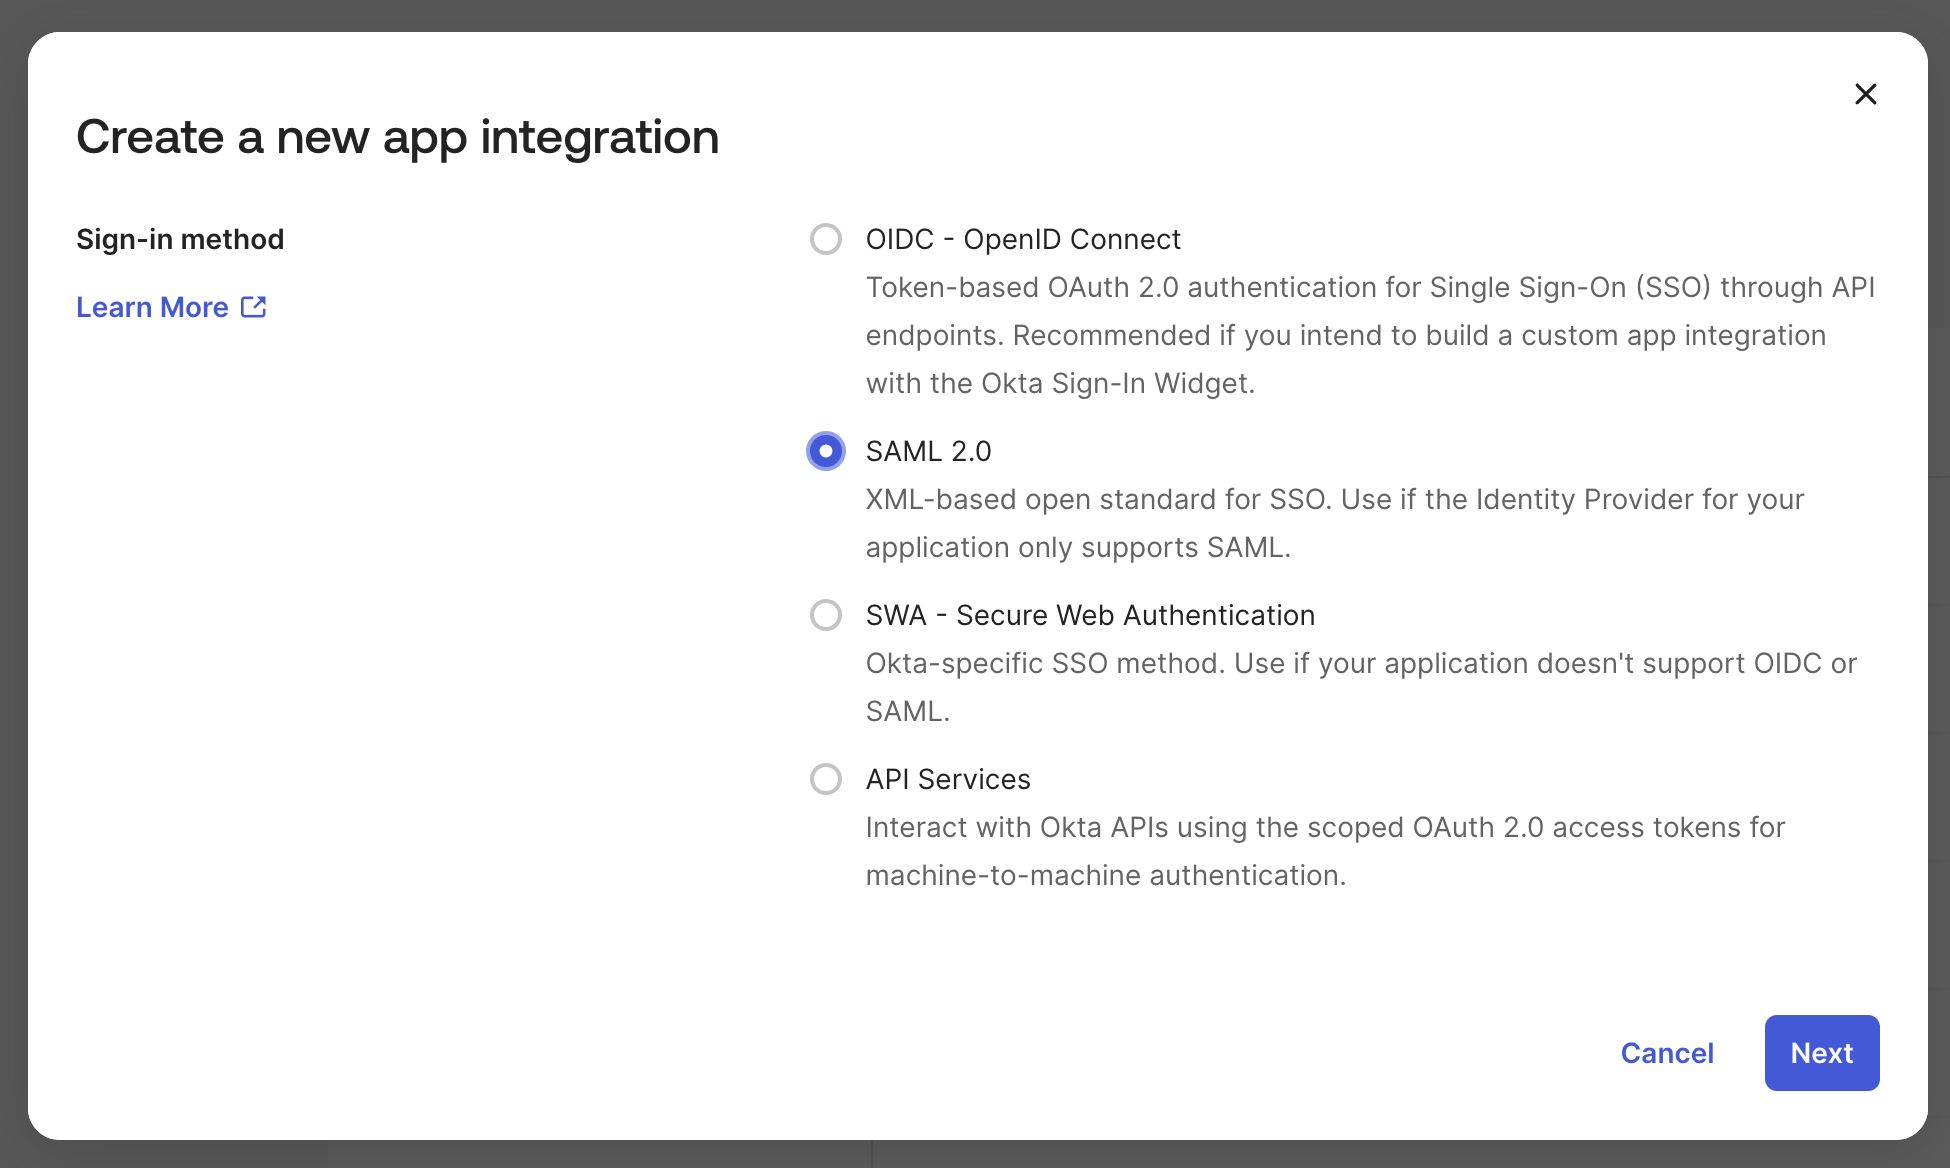
- In the Create a new app integration modal, select the SAML 2.0 option and select the Next button.
- Once redirected to the Create SAML Integration page, complete the General Settings fields. An App name is required (e.g., “Ally Security”).
- Select Next. You’ll be redirected to the Configure SAML page.
Step 2: Configure SAML settings
You’ll need to enter the following information that we (Ally Security) will provide to you:- Single sign-on URL: Paste the Single sign-on URL provided by Ally Security into the Single sign-on URL field.
- Audience URI (SP Entity ID): Paste the Audience URI (SP Entity ID) provided by Ally Security into the Audience URI (SP Entity ID) field.
Step 3: Configure attribute mappings
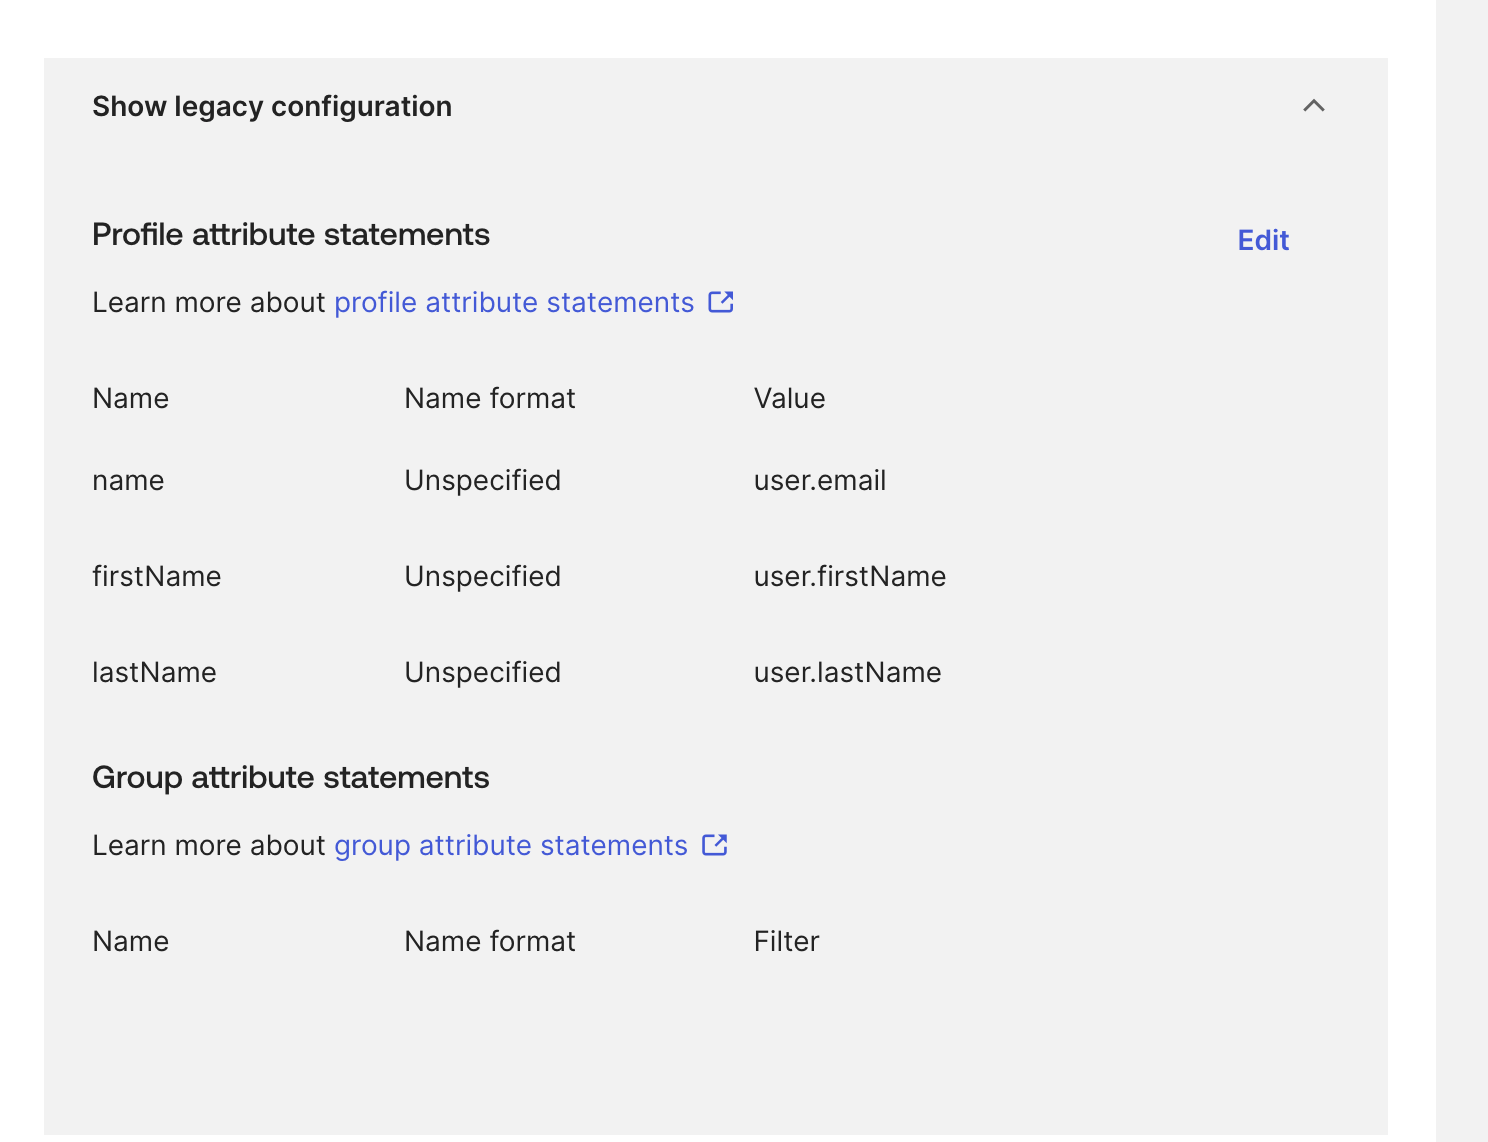
Ally Security requires specific attributes in the SAML response. Configure the following attribute statements:-
In the Attribute Statements (optional) section, add the following attributes:
Email address (required)
- Name field:
mail - Value field: Select
user.emailfrom the dropdown
- Name field:
firstName - Value field: Select
user.firstNamefrom the dropdown
- Name field:
lastName - Value field: Select
user.lastNamefrom the dropdown
- Name field:
- Scroll to the bottom of the page and select the Next button to continue.
- You will be redirected to the Feedback page. Fill out the feedback however you would like and select the Finish button to complete the setup.
Step 4: Assign users or groups
Before users can sign in using SSO, you need to assign them to the enterprise app:- In the Okta dashboard, select the Assignments tab.
- Select the Assign dropdown. You can either select Assign to people or Assign to groups.
- In the search field, enter the user or group of users that you want to assign to the enterprise app.
- Select the Assign button next to the user or group that you want to assign.
- Select the Done button to complete the assignment.

Step 5: Share the Metadata URL with Ally Security
After completing the setup in Okta, you’ll need to provide Ally Security with your app’s metadata URL:- In the Okta dashboard, navigate to your application’s page.
- Select the Sign On tab.
- Under Sign on methods, locate the Metadata URL.
- Copy the Metadata URL.
- Share this URL with your Ally Security contact or support team.

What to provide to Ally Security
To complete the SSO setup, please provide the following information:- Metadata URL: The Metadata URL from your Okta app (as described in Step 5)
- Email domain: The email domain(s) that should be enabled for SSO (e.g.,
@yourcompany.com) - Test user email (optional): An email address of a test user that can be used to verify the SSO configuration
After setup is complete
Once Ally Security has configured SSO on our end:- All users with email addresses ending in your configured domain will be redirected to Okta for authentication
- Users will sign in using their Okta credentials
- Existing users with matching email domains will need to use SSO to sign in
[!WARNING] If there are existing users with email domains that match the SSO configuration, they will be required to use SSO to sign in once it’s enabled. Make sure to communicate this change to your team members.
Troubleshooting
If you encounter issues during setup:- Verify attribute mappings: Ensure that the attribute names (
mail,firstName,lastName) match exactly as specified - Check user assignments: Confirm that users or groups have been assigned to the Okta app
- Verify domain configuration: Ensure the email domain matches what was provided to Ally Security
- Contact support: Reach out to Ally Security support if you need assistance with the configuration